You may find this statement odd, but there is great pleasure in growing plants from seed. Now is the time to get started. Growing from seed defies the instantaneous gratification that comes from buying potted plants. However, growing seeds depends upon consistency.
First, when you start your garden from seed, you get to choose the variety of the plant that you want to grow. Nurseries and box stores sell standard plants, and often the variety does not change much between the stores. If you are adventuresome and want rare or unusual varieties, seeds can be ordered and delivered right to your door. That is a sure way to get your neighbors and friends talking.
Review what type of seed that you are buying. Is it marked hybrid, heirloom, organic? Seed packets should be stamped with the year they are intended to be used. If you have “old” seed, it is easy enough to do a germination test.
Roll 20 seeds in a moist paper towel and keep it moist for seven to 10 days at consistent room temperature in a jar or plastic bag. After that time, open the towel and count the number of seeds that have sprouted. If most have germinated, plant at the usual spacing. If two-thirds to three-quarters have germinated, plant the seed slightly thicker than normal. If less than half of the seeds germinate, experts recommend to discard and purchase new seed. The germination is the first indicator that the seed is subpar and may not yield or yields poorly. With the investment of time and money, you do want to start with seeds that will result in fabulous production and bragging results.
There are seed savers and purchased seed to choose. Saved seed does increase the risk of seed-borne disease. However, heirloom seeds are always saved, heirloom varieties that have been grown in the area for many years, as well as All-American Selection winners. Seeds that are adapted to an area have a history of producing high yields of high-quality vegetables. Do not bother to plant seed saved from hybrid varieties. Both saving and using second-generation hybrid is a waste of time unless you are conducting research or an experiment. As a hybrid, each generation does change erratically from the first plantings and is not dependable in the result.
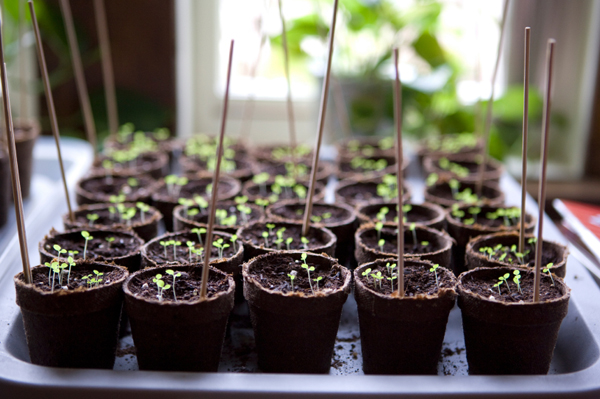
In March, the effort is to start seedlings inside before the garden is ready for planting, getting a head start on the season and, later, delicious results. The suggested seed-starting time is typically six weeks before the average last frost date in your area. From that date, count back in one-week increments. If you are new to starting plants from seed, tomato, pepper, basil, zinnia, marigold, and cosmos seed are responsive to the beginner. These germinate readily and grow quickly.
You can easily buy small pots or pressed peat holders for starting seed. Have you considered upcycling or making your own? You can make your own seed pots from rolled newspaper, cardboard tubes, egg shells, cardboard cupcake liners, stale ice cream cones, take-out containers. It is advisable to minimize tossing plastic pots, so reuse K-Cups and Play-Doh containers. A small water bottle can easily be made into a self-watering pot. Remove the cap. Cut the bottle in half. Then take the top half and insert it into the bottom half with the neck and cap area pointing down. The water is easily seen and can be drawn up to the plant through the bottle’s neck. I am sure just looking around a typical kitchen and trash area, you will have a few ideas of your own. Just remember to water the seedlings from the bottom.
A good starter soil will be key to success, although as a kid, I would just take some dirt from the yard and put it on the bottom of a cardboard milk box. The idea is to have good drainage and texture. A mixture of nutrition, moisture-holding capability and drainage capability will do it.
A blend from Mother Earth News:
– 2 parts sieved compost. The compost will release nutrients gradually, helping to feed seedlings as they develop.
– 2 parts coir (coconut fiber) or leaf mold. Rehydrate a block of coir by soaking it in water until it easily falls apart. Alternatively, use well-rotted leaf mold in place of the coir. The coir or leaf mold adds bulk to the seed mix and helps retain moisture.
– 1 part perlite or sand. Perlite will lighten the mix and improve its air content. If you prefer not to use perlite then you could substitute sand, but be aware that this will give a heavier mixture.
(I have used peat moss instead of coconut fiber or leaf mold.)
If you don’t have compost, you can begin to fertilize when the seedlings are an inch or two tall. If seedling foliage is pale green, yellowish green, or has a purple cast to it, the plants probably need a nutrient boost. Use a diluted amount for the first few boosts. Follow directions. More is not better. It can burn and kill the plants.
You will need light. A minimum of six hours of daylight or controlled grow lights. With grow lights, you can provide 14 hours of light. If you have “Leggy” seedlings, they are often the result of inadequate light; it could be the intensity or duration of the light. The consistency of grow lights does typically produce sturdier seedlings. Remember, though, that they do need dark to rest. It is a natural rhythm.
The seedlings may outgrow their pots before it’s time to move them into the garden. When they are about 4 inches tall, gently remove one of the seedlings from its pot. If the white roots are beginning to fill the soil space, then it’s time to transplant them into a larger pot. Root crowding can stunt plant growth and make it difficult for plants to recover after transplanting, so keep those roots happy and growing. If you are container gardening, you could start the seeds right in the container that the plant will live its life in.
Before you move them into the garden, you need to “harden off” the seedlings. Hardening off is a process of a week or 10 days during which you acclimate your homegrown, protected seedlings to the harsh, real world of the outside garden. Each morning, place the seedlings in a protected spot outside. This will assist them in adapting to the fluctuating temperatures, wind and other factors. But bring them in each night. Some people use a cold frame for this purpose.
May your gardens be great producers this year!