Photos and recipes by Christy Simmons
When I had the idea to put together a grandiose, formal Thanksgiving dinner to share with the Pulse readers, I was disappointed at every turn. First, there was the meal; I wanted to show you this bountiful feast of turkey and ham, eleventy-billion side dishes, compotes and salads and several desserts. Well, it so happens that at the beginning of October, grocery stores just aren’t prepared for an early Thanksgiving feast—not even a little bit. There were no turkeys, there were no cranberries, there was a definite lack of ingredients.
I wanted to show you an amazingly decorated table, with formal china and flowers spilling everywhere. There were going to be fine linens, and place cards with fancy calligraphy, done by yours truly, and heirloom silverware. Then I woke up and realized that I own none of this. I don’t even have a proper dining room, since I live in a townhouse. The view from my dining room table is either of the refrigerator or my washer and dryer, neither of which I consider photoworthy. Luckily, the woman who comes in and oversees our accounts at work heard of my plight (I might have been having a meltdown mere days before this shoot was slated to take place) and graciously offered to let me use her dining room, complete with her mother’s wedding china and antique silverware. This was all wonderful, until I arrive on the day of the shoot and realize that it is so dark in her dining room that the only way I am going to be able to do a shoot in there is to bring in studio lights, which of course I didn’t bring with me.
Despite my altered and pared down menu, and the lighting situation, I went forward with my plans. I measured and chopped, roasted and basted, mashed and sautéed my little heart out, all the while mentally freaking out about the lighting, trying to come up with alternatives. All day, it had been chilly and overcast, so as I got overheated in the kitchen, I would step outside to get a breath of air and try to think of what I could do to remedy this complete disaster. All of a sudden, the clouds broke and a ray of sunshine beamed down on this wrought iron table in my friend’s back garden. No, I didn’t hear singing, and yes, I know that it sounds cliché, but that’s honestly what happened. Looking at that table, I got an idea. We could decorate a table for two outside, something simple but elegant, and take advantage of the weak sunlight that we were getting right before sundown.
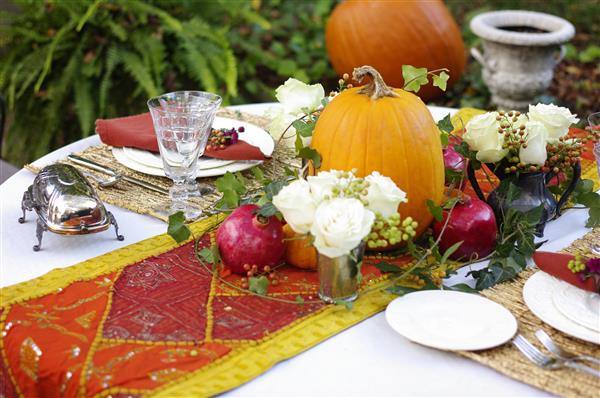
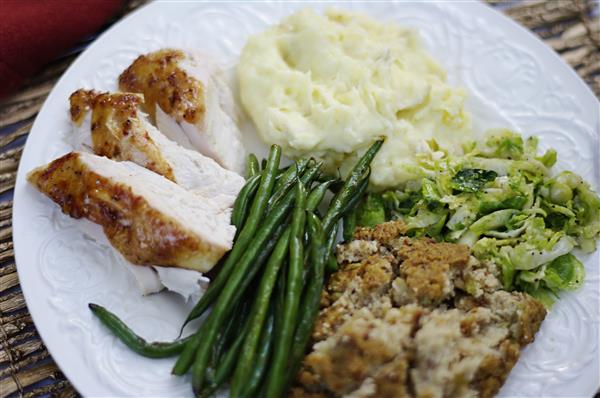
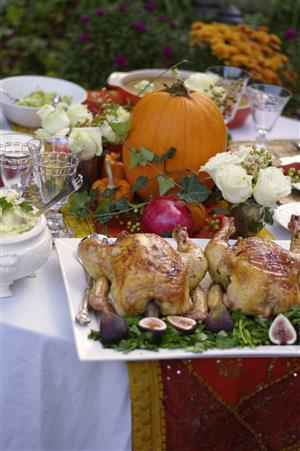
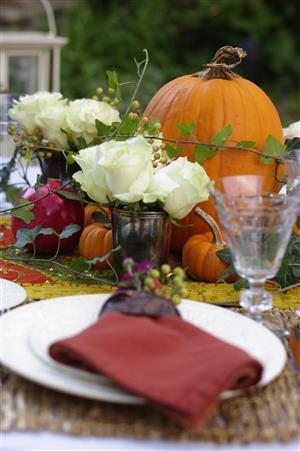
I ran inside and told my friend of my new plan, and we snatched up a tablecloth, plates, fruit and some white roses her husband had picked up. We moved some of the pumpkins she was using for outdoor decorations and set up this gorgeous little table. We piled the food on, constructed a finished plate and I finished shooting right as the sun went down.
As I was sitting out at that table, talking with my friend about the events of the day and laughing with her about it all, a thought occurred to me. Things did not go according to my plans—this is true. But Thanksgiving isn’t about turkeys or cranberries or formal dining rooms. It’s about sharing a meal with people you care about and being grateful for all that you have been given in life. The chickens that I resorted to in lieu of a turkey were delicious and beautiful, I had such a good time cooking and spending the day with my friend and the recipes I have shared are ones that I love and that bring back fond memories of time spent with my family.
I hope that you all take time to slow down and remember the real reason behind Thanksgiving when you sit down with your loved ones and I also hope that these recipes might become something special to your family as well.
Have a wonderful holiday season!
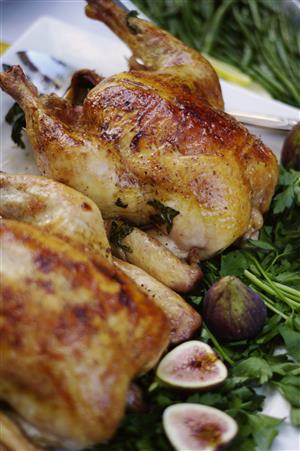
Bourbon Glazed Turkey (Or Chickens!)
One 15-pound turkey (Or two 4-5 lb. roaster chickens)
2 cups apple cider
1½ cups kosher salt
2 cups dark brown sugar
3 rosemary sprigs
1 bunch thyme
1 bunch sage
3 pounds ice cubes
1 medium onion, finely chopped
2 celery ribs, finely chopped
1 large carrot, thinly sliced
10 garlic cloves
1 stick plus 2 tablespoons unsalted butter, softened
1 cup bourbon (local source: Belle Meade Bourbon from Greenbriar Distilleries)
Put the turkey in a brining bag set in a tub or very large pot. In a large saucepan, combine the cider with the salt, 1 cup of the brown sugar and the rosemary, thyme and sage and bring to a simmer, stirring to dissolve the salt and sugar. Add 6 quarts of cold water to the brine and pour over the turkey. Add the ice to the brine and refrigerate the turkey overnight.
Preheat the oven to 450° and set a rack on the lowest shelf of the oven. Drain the turkey and pat dry. Discard the brine. Fill the turkey cavity with half of the onion, celery, carrot and garlic cloves; scatter the remaining vegetables in a large roasting pan. Set a V-shaped rack in the pan. Tie the turkey legs with butcher’s twine and transfer the bird to the rack, breast side up. Add 2 cups of water to the pan and roast the turkey for 30 minutes.
Meanwhile, in a small saucepan, combine the remaining 1 cup of brown sugar with the 1 stick of butter and the bourbon and heat just until the sugar and butter melt.
Reduce the oven temperature to 350° and brush the turkey with some of the glaze. Continue roasting the turkey, brushing it every 15 minutes, for about 3 hours, until an instant-read thermometer inserted into the thigh registers 165°; add another 2 cups of water and tent the turkey with foil halfway through roasting. Transfer the turkey to a carving board and let rest for 30 minutes before carving.
Cranberry Fig Chutney
1 tablespoon extra-virgin olive oil
1 small red onion, chopped (3/4 cup)
1 garlic clove, minced
¾ pound fresh Black Mission figs, stemmed and quartered
One 12-ounce bag of fresh or frozen cranberries
6 tablespoons turbinado sugar
¼ cup red wine vinegar
1 teaspoon finely grated orange zest
½ cup fresh orange juice
½ star anise pod
One 4-inch cinnamon stick
Pinch of salt
In a large saucepan, heat the olive oil. Add the onion and garlic and cook over moderately high heat, stirring, until softened, about 5 minutes. Add all of the remaining ingredients and ½ cup of water and bring to a boil. Simmer over low heat, stirring, until thick and jammy, 25 minutes. Let the chutney cool, then discard the star anise and cinnamon stick.
The chutney can be refrigerated for up to 1 week.
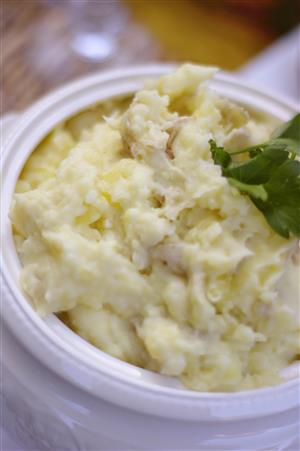
Roasted Garlic Mashed Potatoes
1 five lb. bag of thin skinned, waxy potatoes (I use Yukon Gold or Red potatoes)
1 head of white garlic
1 stick of salted butter (real butter, not margarine)
1 cup of half and half, plus more if needed
Kosher salt and fresh black pepper to taste
Chopped flat leaf parsley, for garnish. (optional)
Take the head of garlic, cut off the very top, so that some of the cloves are visible. Put the garlic on a piece of aluminum foil and drizzle with extra virgin olive oil. Wrap the head up in the foil and bake in a 350-degree oven until soft, or about 30-45 minutes, depending on the size of the head of garlic. Set aside to cool.
I choose thin skinned potatoes because I like to include the skins in the dish. (i.e. I hate peeling!)
Chop the potatoes into chunks roughly the same size and put in a pot of boiling, salted water. While the potatoes are boiling, in a small saucepan, heat the butter and half & half until the butter is completely melted. Potatoes are done when a fork can go through them with no resistance. Drain potatoes and place them back in the pot. Add some of the butter mixture and mash away with a potato masher, adding more of the butter mixture as you go, until the potatoes are the consistency that your family enjoys (I like mine a little chunky). Alternatively, you can put the potatoes in your stand mixer and mash them on low speed with the paddle attachment, adding the butter mixture in a slow stream until it’s the consistency you want.
Take the roasted garlic, now cooled, and transfer the cloves to a small bowl. The easiest way to do this is to turn the head of garlic upside down over the bowl and squeeze. The cloves should squirt right out. Take a fork and mash the cloves up into a paste. Add the garlic paste to the potatoes and mix well. Season to taste with salt and pepper. Serve immediately
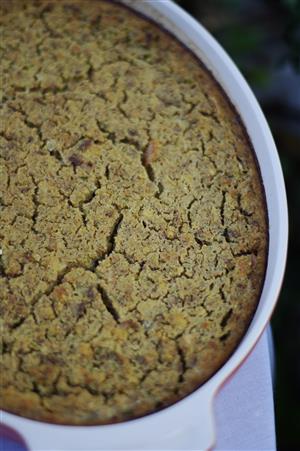
Granny’s Cornbread Dressing
(This was the hardest recipe for me to write down, because it was passed down to me by my granny— not on a piece of paper, but by me making it with her over and over again. I learned how it’s supposed to look and taste; it is very much a “pinch of this” and a “handful of that” type of recipe and based completely on our family’s personal preferences. I have converted it to a recipe anyone can follow, but please, feel free to adapt it to your own personal tastes. As you can see below, we adore sage and black pepper and feel that a dressing should have tons of both!)
1 pan of white cornbread (I use one recipe of Martha White buttermilk cornbread mix, made in a 9-inch cast iron skillet)
6 biscuits (homemade or baked from frozen are both fine, but please, for the love of all that is holy, don’t use canned biscuits!)
1 large onion, chopped finely
3 celery stalks, washed and chopped finely
5 cups of chicken stock, more or less (I make my own and freeze it, but if you need to use store bought, I like the Kitchen Essentials brand in the yellow cardboard carton. It’s usually on the top of the shelf in the soup aisle, above the canned chicken broth. You will need two cartons.)
6 tbs dried sage
6 tbs freshly ground black pepper
2 large eggs, beaten
Kosher salt to taste
The night before I make this recipe, I make my cornbread and my biscuits and let them cool until they can be handled. Then, I crumble them up in a very large bowl and let them sit, uncovered, overnight so that the breads dry out.
The next morning, chop the onion and celery and sauté them in butter until they are soft and translucent. Set that aside to cool. With your clean hands, crumble up the cornbread and biscuits until the crumbs are as fine as you can get them. Add the sage, pepper and cooled onion mixture to the crumbs and mix well. Add enough chicken stock to the mixture so that you see a little bit pooling on the top. Stir well and then let sit so the bread can absorb the stock. Depending on how much moisture evaporated from the breads overnight, I might do this step 1-2 times more. You want the mixture to be loose and soupy. If you were to mix in stock till it’s wet and immediately throw it in the oven, it would be very dry when you took it out due to the bread soaking up all the liquid. So don’t skip this step! When your bread isn’t absorbing any more stock, taste the mixture and add salt or adjust your seasonings as needed. Then add the beaten eggs and mix well. Pour into a buttered casserole dish and bake in a 350-degree oven until the center of the dressing is set (and your kitchen smells like heaven!), about 30-45 minutes depending on how deep or shallow your casserole dish is.
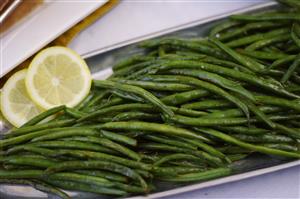
Lemon Haricot Vert aka Yummy Baby Green Beans
(Something magical happens when you add lemon juice to vegetables and butter in a hot pan- it makes this glaze that sticks to the vegetables and elevates even something as simple as green beans into something truly delicious. And it’s SO EASY!!)
2 lbs of haricot vert (French green beans), rinsed
2 tbs Extra Virgin Olive Oil
2 tbs of unsalted butter
1 lemon, halved
Kosher salt and black pepper, to taste
Drop the green beans into a pot of salted, boiling water for two minutes to blanch them. When the beans turn a bright shade of green, they are done. Immediately take them out of the boiling water and plunge them into an ice bath to stop the cooking process. (Ice bath= a bowl filled with cold water and ice) Remove from the ice bath and place on paper towels; pat them dry.
In a sauté pan or skillet, heat the butter and the olive oil over medium high heat until the butter is foaming. Add your dried green beans and sauté for 3-4 minutes. Keep the heat on medium high and squeeze half of a lemon over the beans. Sauté until most of the juice has evaporated, or 1-2 minutes. Serve immediately.
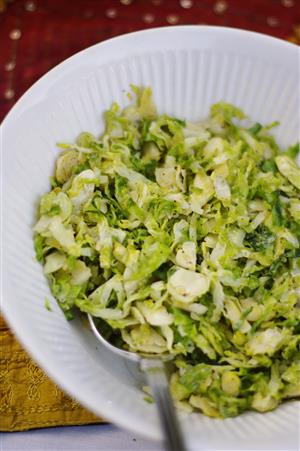
Sautéed Brussels Sprouts with Caramelized Shallots
(Most people hate brussels sprouts — but I have converted many a hater into a lover with this simple recipe. It’s one of the most requested dishes at my house)
2 lbs of fresh brussels sprouts (always choose the smallest ones you can find — they taste the best)
3-4 med.-lg. shallots
6 tbs unsalted butter
Kosher salt and black pepper to taste
Remove any bad outer leaves of the sprouts, then cut the sprout in half lengthwise. Slice the sprouts widthwise, very finely. You want the sprouts to almost be shredded. Discard the ends of the sprouts. Peel the shallots and cut them in the same way. In a saute pan or skillet, heat two tablespoons of butter over medium heat till just melted. Add the shallots and a pinch of sugar. Saute the shallots until they start to get soft, then turn the heat down to low and continue to cook, stirring occasionally, until the shallots are a dark caramel color. Transfer the shallots to a small bowl and set aside.
In the same pan, heat the remaining butter till melted, then add the shredded sprouts. Sprinkle with salt and pepper. Cook, stirring occasionally, until the sprouts are softened and slightly browned. They should still retain a green color and some bite. Add the shallots back in and stir to distribute. Serve immediately.
Sweet Potato (and Marshmallow) Biscuits
Makes 12 to 14 two-inch biscuits
1 lb. sweet potatoes (red skinned are my favorite)
⅓ cup buttermilk
2 cups all-purpose flour
1 tbs baking powder
3 tbs granulated sugar
1 teaspoon ground cinnamon
¼ teaspoon ground nutmeg
¼ teaspoon ground ginger
⅛ teaspoon ground cloves
½ teaspoon table salt
5 tbs unsalted butter, cold
1 cup miniature marshmallows (optional)
The day before, or a couple hours in advance: Preheat oven to 400°F. Place sweet potato on a tray and roast until soft, about 40 to 45 minutes. Let cool completely in skin (the fridge can speed this up), then peel. Either run potato flesh through a potato ricer or mash it until very smooth. You’re looking for ¾ cup sweet potato puree (I get closer to 1 1/3 cups from 1 pound. Melt some salted butter over any remainder and sprinkle with chives — happy lunch!)
You’ll probably have turned your oven off by now, so preheat it again to 400°F. Line a baking sheet with parchment paper and set aside. Whisk ¾ cup reserved sweet potato puree with buttermilk until smoothly combined. Keep nearby.
In the bottom of a large, wide-ish bowl, whisk flours, baking powder, sugar, spices and salt together. If you have a pastry blender, add the butter (if you have a sturdy pastry blender, no need to chop it first) and use the blender to cut the butter into the flour mixture until the biggest pieces are the size of small peas. If you don’t have a pastry blender, cut the butter into small pieces with a knife and work the butter into the flour mixture with your fingertips until the mixture resembles a coarse meal.
For both methods, continue by adding the sweet potato mixture and stir and break it up until the mixture is in big, soft chunks. Get your hands in the bowl and gently knead the dough into an even mass, using as few motions as possible (and thus, warming the dough as little as possible.).
With marshmallows: Roll or pat dough out on a floured counter to a ½-inch thickness and divide evenly in half. Sprinkle marshmallows loosely over half of dough. Place the second half on top of marshmallow and use rolling pin to gently press the sides together, keeping the final dough thickness at a full inch.
Without marshmallows: Roll or pat dough out on a floured counter to a 1-inch thickness.
Both methods: Dip a 2-inch biscuit cutter in flour then form biscuits by cutting straight down and not twisting — this will help give your biscuits the maximum rise. Bake biscuits on prepared sheet for 13 to 15 minutes, until puffed and slightly golden on top. Cool on rack and enjoy as soon as possible.
Do ahead: Biscuits are best on the first day that they’re baked. To make them ahead of time, arrange cut biscuits on a tray to freeze them. Once frozen, transfer them to a freezer bag until needed. Bake at same temperature straight from freezer; biscuits will take about 2 minutes longer to bake.
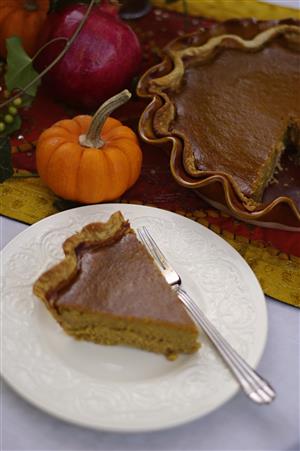
Real Pumpkin Pie
2 cups of pumpkin pulp purée from a sugar pumpkin* (or from canned pumpkin purée)
1½ cup heavy cream
½ cup packed dark brown sugar
⅓ cup white sugar
½ teaspoon salt
2 eggs plus the yolk of a third egg
2 teaspoons of cinnamon
1 teaspoon ground ginger
¼ teaspoon ground nutmeg
¼ teaspoon ground cloves
¼ teaspoon ground cardamon
½ teaspoon of lemon zest
1 good pie crust
* To make pumpkin purée from a sugar pumpkin: start with a small-medium sugar pumpkin, cut out the stem and scrape out the insides, discard (save the seeds, of course). Cut the pumpkin in half and lay cut side down on a rimmed baking sheet lined with silpat or aluminum foil. Bake at 350°F until fork tender, about an hour to an hour and a half. Remove from oven, let cool, scoop out the pulp. (Alternatively you can cut the pumpkin into sections and steam in a saucepan with a couple inches of water at the bottom, until soft.) If you want the pulp to be extra smooth, put it through a food mill or chinois.
Method
1. Preheat oven to 425°F.
2. Mix sugars, salt, and spices, and lemon zest in a large bowl. Beat the eggs and add to the bowl. Stir in the pumpkin purée. Stir in cream. Whisk all together until well incorporated.
3. Pour into pie shell and bake at 425°F for 15 minutes. After 15 minutes reduce the temperature to 350°F. Bake 40-50 minutes, or until a knife inserted near the center comes out clean.
4. Cool on a wire rack for 2 hours. Note that the pumpkin pie will come out of the oven all puffed up (from the leavening of the eggs), and will deflate as it cools.
Serve with whipped cream.
